As a trusted Matrix Drill Pipe supplier, I understand the importance of a proper installation process. Matrix Drill Pipe is a crucial component in various drilling operations, and its correct installation can significantly impact the efficiency and safety of the entire project. In this blog, I will guide you through the step - by - step process of installing Matrix Drill Pipe.
Pre - installation Preparations
Before you start the installation, several preparations are necessary. First, ensure that the drilling site is well - prepared. The ground should be level and stable to support the drilling equipment and the drill pipe. Any debris, rocks, or other obstacles on the surface should be removed.
Inspect the Matrix Drill Pipe thoroughly. Check for any signs of damage, such as cracks, dents, or corrosion. A damaged drill pipe can lead to serious problems during drilling, including pipe failure and potential safety hazards. If you find any damaged pipes, do not use them. Instead, contact your Matrix Drill Pipe supplier for replacement.
Gather all the necessary tools and equipment for the installation. This typically includes a torque wrench, pipe wrenches, and a hoist or crane to lift the drill pipes. Make sure that all tools are in good working condition and calibrated correctly.
Handling the Drill Pipes
When handling Matrix Drill Pipes, it is essential to follow proper procedures. Pipes should be lifted and moved carefully using a hoist or crane. Avoid dropping or banging the pipes, as this can cause internal or external damage.
The drill pipes should be stored horizontally on a flat and stable surface. If they need to be stacked, make sure that the stacking is done in an orderly manner to prevent pipes from rolling or falling. Use proper supports to keep the pipes in place.
Connecting the Drill Pipes
The connection of Matrix Drill Pipes is a critical step in the installation process. Most Matrix Drill Pipes are connected using threaded joints. Before making the connection, clean the threads of both the pin and the box ends of the pipes. Remove any dirt, grease, or debris that may be present.
Apply an appropriate thread compound to the threads. The thread compound helps to create a tight seal and prevent leakage. It also reduces friction during the make - up process, which can prevent damage to the threads.
Use a torque wrench to tighten the connection to the specified torque value. The torque value is usually provided by the manufacturer and is based on the size and type of the drill pipe. Over - tightening or under - tightening the connection can lead to problems such as leaks or joint failure.
Assembling the Drill String
Once the individual drill pipes are connected, assemble them into a drill string. Start by attaching the first drill pipe to the kelly or the top drive of the drilling rig. Make sure that the connection is secure.
Continue adding drill pipes one by one, following the same connection procedure. As you add each pipe, check the alignment to ensure that the drill string is straight. A misaligned drill string can cause uneven wear on the pipes and the drilling equipment, and it may also lead to drilling problems.
Lowering the Drill String
After the drill string is assembled, it is time to lower it into the borehole. Use the hoist or crane to carefully lower the drill string. During the lowering process, monitor the tension of the drill string to ensure that it is not too tight or too loose.
Pay attention to any signs of resistance or abnormal movement. If you encounter any problems, stop the lowering process immediately and investigate the cause. It could be due to an obstruction in the borehole or a problem with the drill string connection.
Securing the Drill String
Once the drill string is in the correct position in the borehole, secure it properly. This may involve using slips or a spider to hold the drill string in place at the surface. Make sure that the slips or spider are properly installed and tightened to prevent the drill string from moving.
Post - installation Checks
After the installation is complete, conduct a series of post - installation checks. Check the connections between the drill pipes again to ensure that they are still tight. Look for any signs of leakage around the connections.
Inspect the drill string for any signs of misalignment or damage that may have occurred during the installation process. Check the tension of the drill string and make any necessary adjustments.
Comparison with Other Drill Pipes
Matrix Drill Pipe has its own unique features and advantages compared to other types of drill pipes. For example, compared to Welding Drill Pipe, Matrix Drill Pipe often has better thread integrity and is easier to install and disassemble.
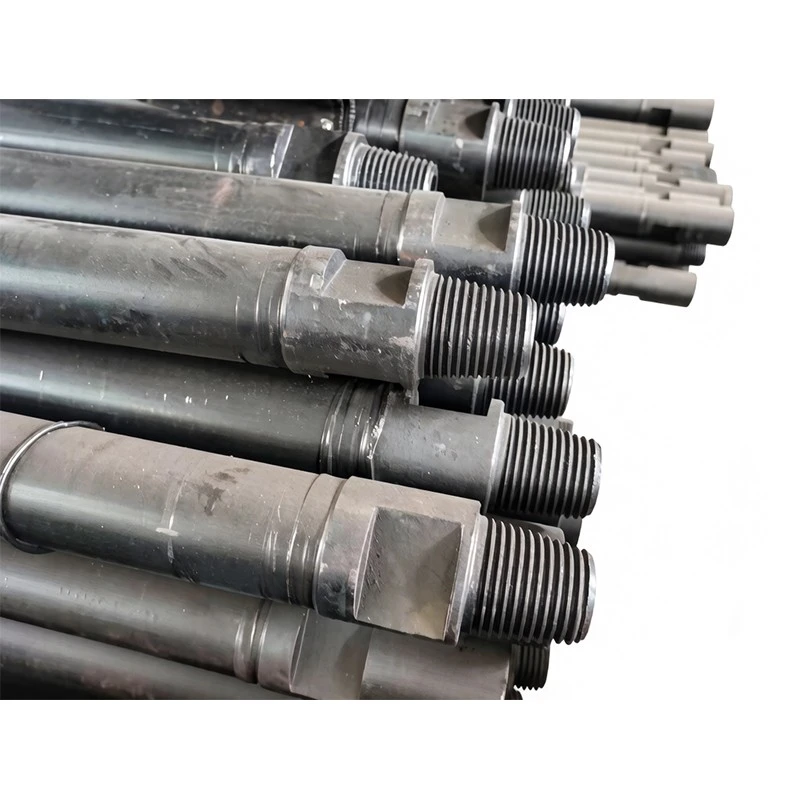

Dth Drill Pipe is mainly used in down - the - hole hammer drilling and has different working principles. Matrix Drill Pipe is more versatile and can be used in a wider range of drilling applications.
Reverse Circulation Drill Pipe is designed for reverse circulation drilling, where the drilling fluid flows in the opposite direction. Matrix Drill Pipe can be used in both normal and reverse circulation drilling with proper adaptations.
Directional Drill Pipe is specifically designed for directional drilling, which requires high flexibility and strength. Matrix Drill Pipe can also be used in directional drilling projects with appropriate design and selection.
Conclusion
Installing Matrix Drill Pipe requires careful preparation, proper handling, and precise execution. By following the steps outlined in this blog, you can ensure a successful installation and a smooth drilling operation.
If you are in the market for high - quality Matrix Drill Pipe or have any questions about the installation process, feel free to contact us. Our team of experts is ready to assist you with your procurement needs and provide professional advice.
References
- Industry standards and guidelines for drill pipe installation.
- Manufacturer's manuals for Matrix Drill Pipe.